
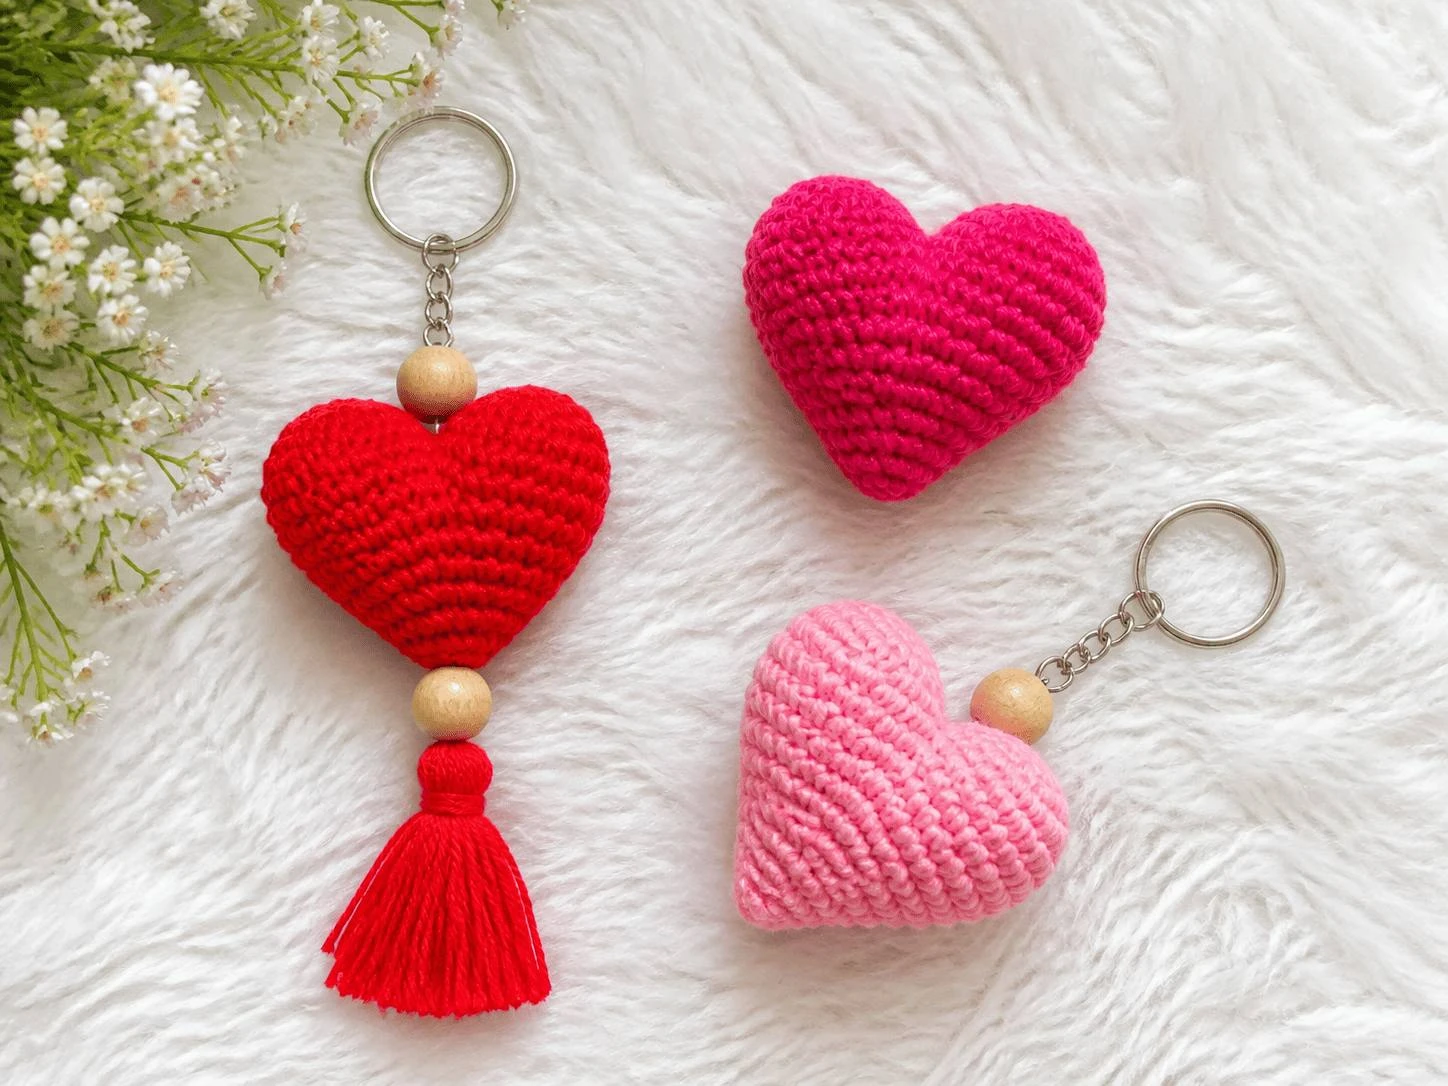
How to Crochet a 3D Heart: The Beginner Keychain Tutorial
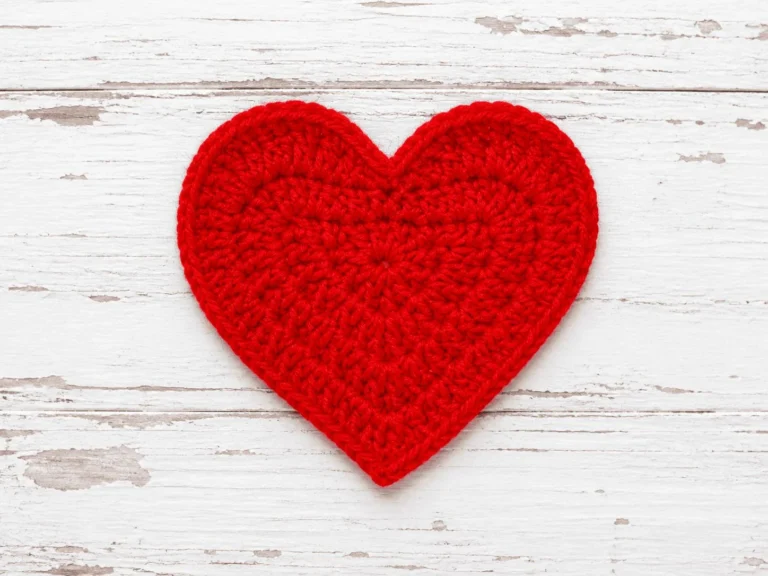
Somewhere between the magic ring and the final squeeze of stuffing, a strange thing happens: you stop following instructions and start making a thing people keep. A crocheted heart is tiny — it lives in your palm, weighs nothing, costs scraps — and yet it carries more feeling per stitch than almost anything else you can make with yarn.
This tutorial walks the whole heart in slow, honest order: the magic ring that starts it, two identical little cups, the round that marries them, the decreases that pull the shape into its point, and the stuffing and closing that make it plump and three-dimensional. Every round is single crochet — the increases and decreases are just single crochets that share an address.
If you can wrap yarn around two fingers and pull a loop through, you can make this heart. Warm up your hands, grab the softest scrap in your basket, and begin.
The Tiny Project That Teaches Everything
The crochet heart keychain is secretly a perfect first amigurumi. In under an hour it hands you the four skills every stuffed crochet project is built from — the magic ring, increasing, decreasing, and closing over stuffing — wrapped in a shape small enough that mistakes cost you nothing. Rip back a round and you have lost ninety seconds, not a weekend.
The build order is simple: crochet two shallow cups, join them into one round, shape the bottom into the heart’s point, stuff, and close. The top lobes appear automatically from the two cups you already made.
What this tutorial covers
- The magic ring, wrapped on two fingers and pulled shut without a hole
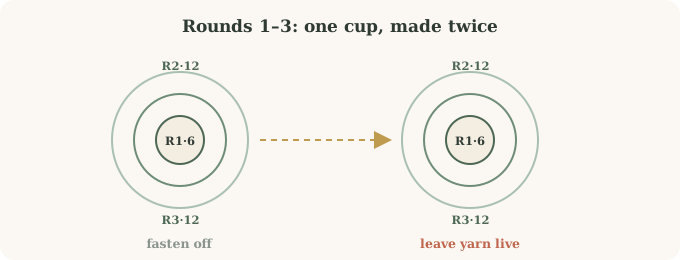
- Rounds 1–3: growing one half of the heart from 6 to 12 stitches
- Joining both halves with one continuous round of 24 single crochets
- Decrease rounds that narrow the body into the classic point
- Stuffing for volume and the final decrease round that seals it
- Weaving the tail away so the heart looks store-bought neat
Materials for the Crochet Heart Keychain
This is the ultimate stash-buster: one heart drinks only a few grams of yarn, so the scrap basket is your shop. Five-ply milk cotton holds a crisp, rounded stitch definition that makes amigurumi look plush and clean, but any smooth worsted cotton will behave the same way.
| Material or Tool | Recommended Spec | Notes for Beginners |
|---|---|---|
| Yarn | 5-ply milk cotton, any color | Smooth cotton shows stitches clearly while you’re learning to count |
| Crochet hook | 3 mm | Small hook plus soft yarn keeps stitches tight so stuffing never peeks through |
| Stuffing | Polyester fiberfill | A fingertip-sized pinch is plenty; add it before the closing rounds |
| Stitch marker | One locking or ring marker | Marks the first stitch of every round — non-negotiable in spiral amigurumi |
| Darning needle | Blunt tapestry needle | Hides the closing tail inside the heart |
| Scissors | Any sharp pair | For clean fasten-offs |
Swipe the table sideways to see every column.
The Magic Ring, Without the Mystery
Every amigurumi begins with a magic ring because it closes the center completely — no donut hole in the middle of your heart. It feels awkward exactly once; by your third heart you will do it mid-sentence.
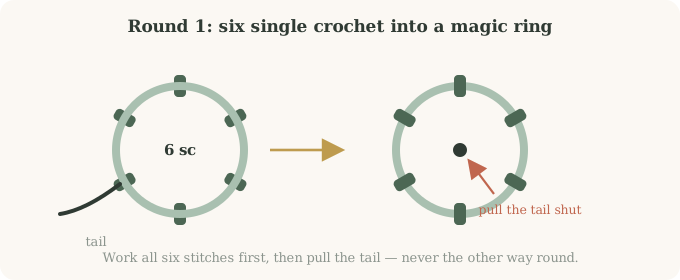
Magic ring, step by step
- Leave a short tail, then wrap the yarn around two fingers twice, keeping the strands flat and uncrossed on your palm side.
- Slide the hook under both strands, reach over the working yarn, and yarn over.
- Pull a loop through and slip the whole bundle off your fingers, holding the loop with your fingertips.
- Yarn over and pull through the loop on the hook to lock it — your ring is live, and the tail still tightens it like a drawstring bag.
Crocheting One Half of the Heart
Each half is a shallow cup built from three tiny rounds. Work slowly, count out loud, and clip your marker into the first stitch of every round — in amigurumi, the marker is your compass.
| Round | Pattern | Stitches at End |
|---|---|---|
| Round 1 | 6 single crochet into the magic ring, pull tail tight, slip stitch to join, mark first stitch | 6 |
| Round 2 | Chain 1, 2 single crochet in every stitch (6 increases), slip stitch | 12 |
| Round 3 | Chain 1, 1 single crochet in each stitch, slip stitch | 12 |
Swipe the table sideways to see every column.
- Round 1: work 6 single crochets into the open ring, over both strands. Pull the tail to close it into a button, clip a marker into the first stitch, and join with a slip stitch.
- Round 2: chain 1, then make an increase — two single crochets — in every stitch around. Six stitches become twelve. Slip stitch to join.
- Round 3: chain 1 and work one single crochet in each of the 12 stitches. The cup starts to curve in your hand. Slip stitch, and on the first cup, fasten off.
- Repeat rounds 1–3 for the second cup — but this time leave the yarn attached. That living strand is what joins the halves next.
Marrying the Halves: One Round, Twenty-Four Stitches
Hold the two cups side by side with their openings facing each other, like two halves of a shell about to close. With the yarn still attached to the second cup, crochet one continuous round through both — 12 stitches across the first cup, 12 across the second, 24 in total. This round is the heart’s equator; everything above it becomes the lobes, everything below becomes the point.
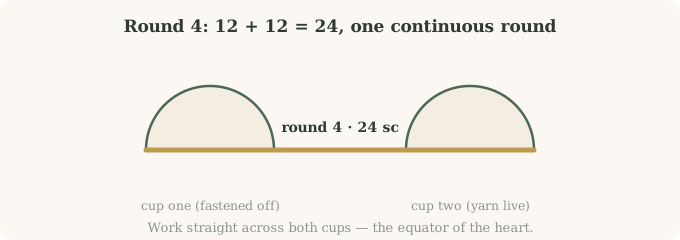
- With the second cup’s live yarn, single crochet across its 12 stitches, then continue straight into the first cup’s 12 stitches. The two cups click together into one wide opening.
- Slip stitch to join and move the marker up. You now have a small open vessel with a dip in the middle — the heart is officially one piece.
Shaping the Point: Decreases, Stuffing, and the Close
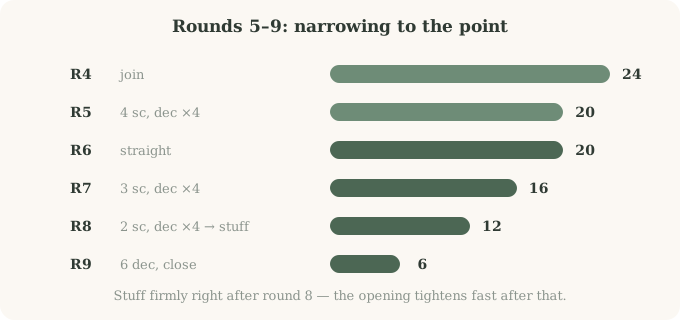
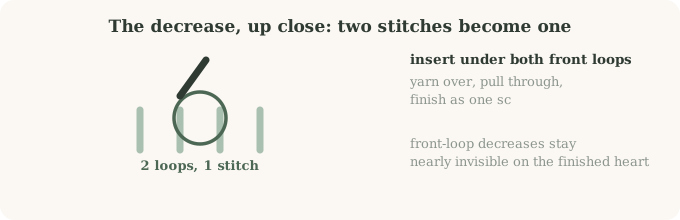
Decreases are the heart’s sculpting tool: two stitches worked together into one, which pulls the fabric inward. Worked in even groups around the round, they taper the body toward the classic point. Here is the whole shaping ladder.
| Round | Pattern (repeat around) | Stitches at End |
|---|---|---|
| Round 5 | Chain 1, (4 sc, 1 decrease) ×4, slip stitch | 20 |
| Round 6 | Single crochet in each stitch, slip stitch | 20 |
| Round 7 | Chain 1, (3 sc, 1 decrease) ×4, slip stitch | 16 |
| Round 8 | Chain 1, (2 sc, 1 decrease) ×4, slip stitch — then stuff | 12 |
| Round 9 | 6 decreases, chain 1, cut yarn — then cinch closed by hand | 6, hand-closed |
Swipe the table sideways to see every column.
The decrease, up close
- Rounds 5–8: follow the ladder above, moving the marker up at every join and tightening each slip stitch. The vessel visibly narrows into a cone.
- Stuff after round 8: push fiberfill in with small pokes until the heart feels plump but not stretched — it should sit round in your palm with the lobes standing proud.
- Round 9: work 6 decreases in a row to bring the opening from 12 down to 6 stitches, chain 1, and cut the yarn leaving a tail.
- Close and hide: thread the tail on the darning needle, run it through the front loop of each of the last 6 stitches, pull gently to cinch the hole fully shut, then travel the needle through the heart’s interior and out the side before trimming — the tail vanishes inside.
Finishing Touches and Troubleshooting
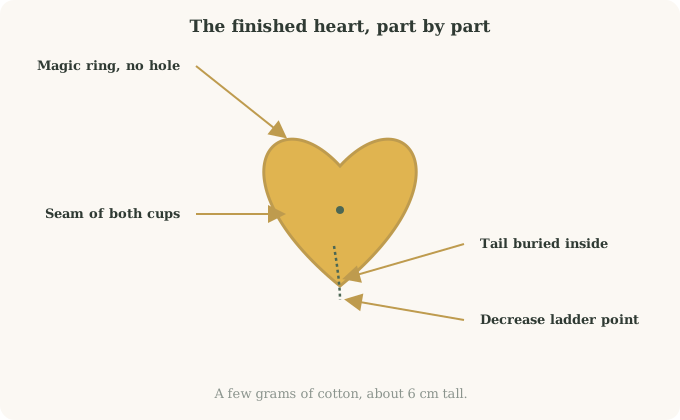
Finishing and care
- Shape it: gently pinch the two lobes apart and press the point; a light steam, held away from the yarn, settles the stitches plush
- Hardware: sew a small jump ring or stitch a yarn loop into the top dip for keys and backpacks
- Care: milk cotton hearts hand wash cool and dry flat — squeeze, don’t wring, so the stuffing keeps its loft
Troubleshooting at a glance
| Symptom | Likely Cause | Fix |
|---|---|---|
| Hole in the center of a half | Magic ring tail never tightened | Pull the tail right after round 1, every time |
| 13 stitches instead of 12 | Loose slip stitch counted as a stitch | Tighten joins; count at the end of each round |
| Half lies flat, won’t cup | Increase round missed | Confirm 12 stitches before leaving round 2 |
| Heart leans or lops | Decreases bunched on one side | Follow the repeat counts so decreases space evenly |
| Stuffing shows through | Tension loose or hook too big | Drop to a 2.5–3 mm hook and keep stitches snug |
Swipe the table sideways to see every column.
From one heart to a habit
A row of these in gradient colors is genuinely craft-fair gold — fast to make, cheap in materials, and small enough to sell at a price that still feels like a bargain. Once you’ve made a dozen, you’ll have your own rhythm down to twenty minutes a heart.
Crochet Heart Keychain FAQ
Nine Rounds, One Small Keepsake
Look at the whole journey: a loop around two fingers became a button, the button became a cup, two cups became a vessel, and a ladder of decreases pulled that vessel into a heart you can squeeze. Every skill you just used — magic ring, increase, decrease, stuffing, closing — transfers straight to every amigurumi you will ever love making.
Your heart checklist
- Magic ring, 6 sc, pull the tail tight, slip stitch, mark
- Round 2: 6 increases → 12; round 3: 12 sc — first cup done, fasten off
- Second cup identical, yarn left live
- Round 4: 24 sc joining both halves
- Rounds 5–8: decrease ladder 20 → 20 → 16 → 12, stuff firmly
- Round 9: 6 decreases, cut, thread the tail through and cinch shut by hand
- Pinch the lobes, add a keyring, and hand it to someone who needs it
Ready to make your first heart?
One scrap of yarn, one quiet half hour, and a small warm thing exists that did not before. Make one for your keys, one for your bag, one for the person you keep meaning to thank.
2 Comments
Comments are closed.