How to Crochet a Drawstring Pouch: The Absolute Beginner’s First Pouch
There is a tiny, ridiculous, completely wonderful moment near the end of this project. You thread a soft cord through the top of a little square you made with your own hands, pull the two tails — and the mouth of the pouch gathers shut like a purse breathing in. Earbuds, lip gloss, a hair tie, the coins that live at the bottom of your bag: all of them suddenly have a home, and you built it from a single strand of yarn.
That moment is why the crochet drawstring pouch is one of the best first projects in the craft. It is small enough to finish in one sitting, useful enough to actually get used, and forgiving enough that a wobbly stitch or two only adds charm.
Every step here — slip knot, chain, double crochet, slip stitch, fasten off, even threading the drawstring — is demonstrated slowly and in order, because this guide assumes you have never held a hook before.
Grab a cup of something warm, sit down with your yarn, and let’s make your first pouch together.
A Beginner Crochet Pouch That Forgives Everything
A drawstring pouch pattern is about as simple as crochet gets: it uses only three moves — chain, double crochet, and slip stitch — repeated in rounds until you decide it is done. There is no shaping, no counting increases, no sewing seams. The width is whatever length you chain. The height is however many rounds you feel like crocheting. The whole pattern is literally in your hands, which is exactly what makes it such a forgiving beginner crochet pouch.
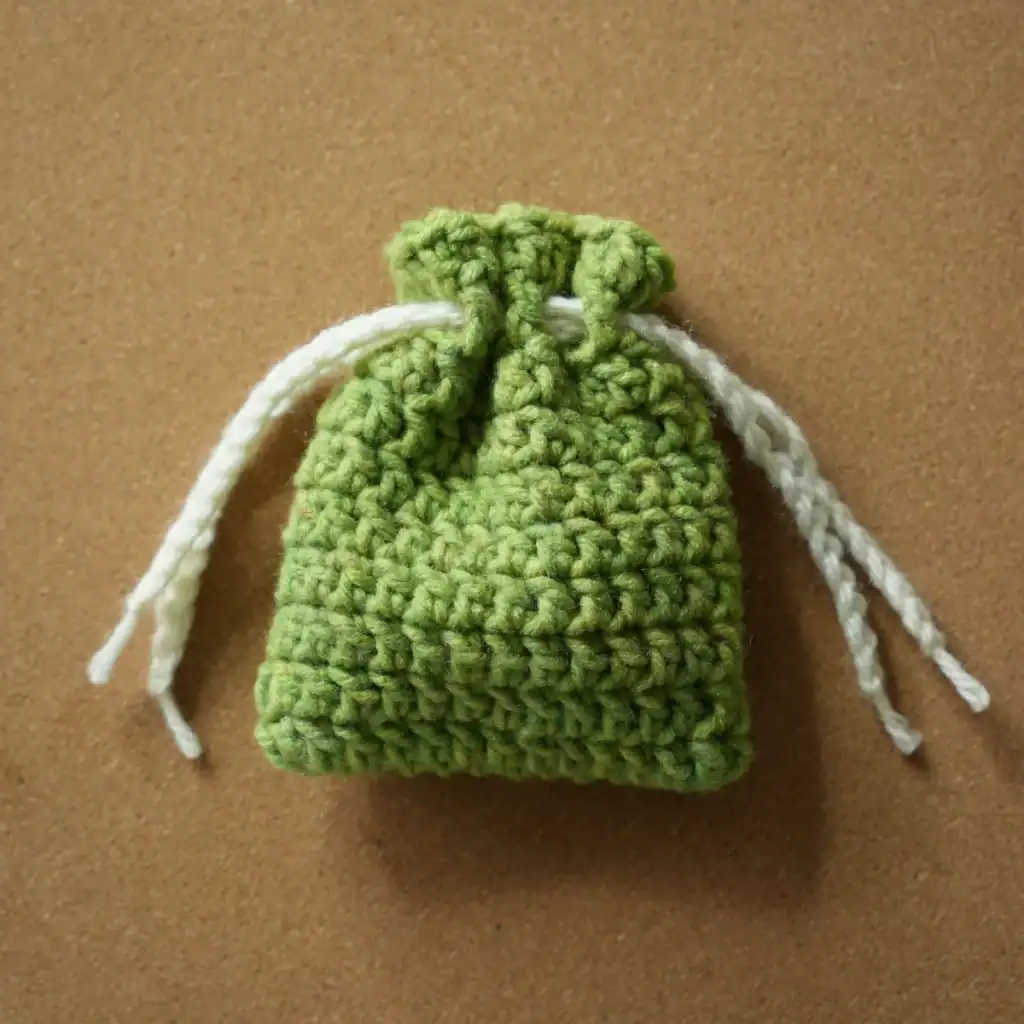
Finished, it is a small crochet cinch bag that works as an earbud case, a lip gloss holder, a gift pouch, or a drawer organizer. Make ten in different colors and you have suddenly got a handmade gift line.
What This Tutorial Covers
- How to hold your yarn and hook comfortably before a single stitch
- The slip knot and the foundation chain that sets your pouch width
- Your very first double crochet, marked and counted properly
- Turning both corners at the ends of the chain so Round 1 curves into a true oval
- Joining rounds with a slip stitch — and the one tightening habit that keeps edges straight
- Building height with repeat rounds, then fastening off cleanly
- Making and threading the drawstring for the cinch-top finish
Materials for the Crochet Drawstring Pouch
This project is a brilliant stash-buster: the body takes only a small ball of yarn and the drawstring a few meters of a contrast color. The sample uses five-ply milk cotton, which has a soft, round, springy texture that shows stitches clearly — ideal while you are learning to read your work.
Your Complete Supplies Table
| Material or Tool | Recommended Spec | Notes for Beginners |
|---|---|---|
| 🧶 Yarn (body) | 5-ply milk cotton, any color | Green or any light color in this sample — smooth, light-colored yarn makes stitches easiest to see |
| 🧶 Yarn (drawstring) | Contrast color, same weight | A few meters is plenty; a cream or terracotta cord shows up nicely against a green body |
| 🪹 Crochet Hook | 3 mm | Matches 5-ply milk cotton; if your tension runs tight, try 3.5 mm |
| 📌 Stitch Marker | One locking or ring marker | Marks your first double crochet so the round joins in the right place |
| 🧡 Tapestry Needle | Blunt darning needle | Threads the drawstring and weaves in ends |
| ✂️ Scissors | Any sharp pair | For fastening off and trimming tails |
Swipe the table sideways to see every column.
If you are new to yarn labels, the Craft Yarn Council’s yarn weight standards are a handy reference for matching hook size to any yarn you already own.
Holding Your Yarn and Making the Slip Knot
Before any crochet happens, your two hands need jobs. The right hand drives the hook; the left hand feeds the yarn at an even, gentle tension. Getting comfortable here saves you cramps and tangled yarn later.
How to Hold Everything
- The hook: hold it like a pen, gripped between thumb and forefinger with the shaft resting on your middle finger — or like a knife, if that feels better. Both are correct; comfort wins.
- The yarn: wrap the working yarn around three fingers of your left hand (index to ring), letting it flow over the top of your index finger. This light wrap is your tension valve — snug enough to control, loose enough to glide.
- Your posture: elbows relaxed, work at chest height, and shake your hands out every few minutes. Crochet should feel calm, not clenched.
The Slip Knot, Step by Step
- Leave a short tail, then loop the working yarn over itself to form a circle.
- Reach through the circle, grab the working yarn, and pull a new loop through.
- Slide that loop onto your hook.
- Pull both the tail and the working yarn gently until the knot sits snug but sliding on the hook — it should tighten and loosen smoothly when you tug either end.
The Foundation Chain and Your First Double Crochets
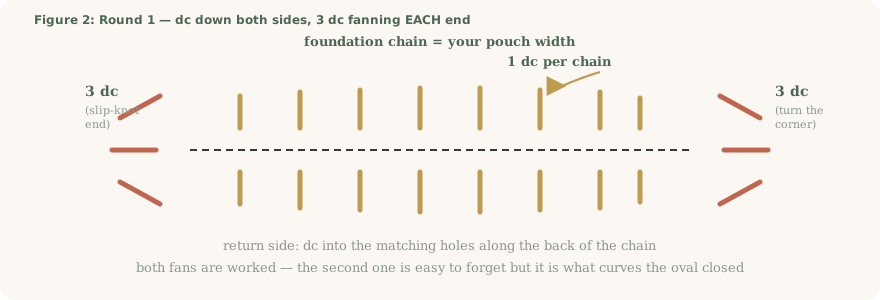
Round 1 builds the base of the pouch: a foundation chain that sets the width, a row of double crochets along it, a little fan of stitches to turn each corner, and a return trip down the opposite side of the chain. Work it slowly and the whole round clicks into place.
Chain and First Stitches
- Chain to your width: yarn over, pull through the loop on the hook — that is one chain. Keep chaining until the strip matches how wide you want the pouch (a small earbud pouch is roughly a hand-span or less). Count out loud; chains love to escape.
- Chain 2 more for height. These two chains give your first double crochet room to stand — they do not count as stitches.
- First double crochet: yarn over, insert the hook into the 3rd chain from the hook, yarn over and pull up a loop, then (yarn over, pull through two loops) twice. One tall stitch stands up.
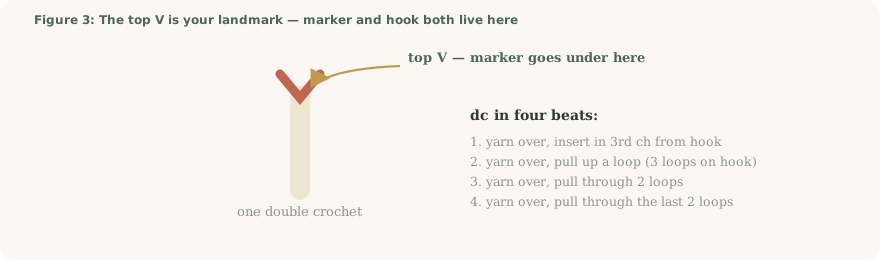
- Mark it: clip a stitch marker under the little V at the top of that first dc. Your round will join back to exactly this spot.
- Double crochet into every remaining chain down the row, one per chain, until a single chain remains at the far end — keep the marker in place as you go.
- Turn the corner: in that last chain, work 3 double crochets total (not stacked on top of a stitch already there). That little fan is what makes the work curve around the end instead of stopping in a point.
- Rotate and work one dc into each chain down the opposite side of the foundation chain, into the matching holes along its back. As you go, lay the starting tail along the work and crochet over it — weaving it in as you travel.
- Turn the second corner: when you reach the last chain of this side — the same chain your slip knot started in — work 3 double crochets again, mirroring the first fan. This second fan is easy to skip, but it is what turns Round 1 into a smooth oval instead of a pointed rectangle.
- Join: find the marked first dc and make a slip stitch into its top V. Round 1 is a closed oval.
Building the Walls: One Repeat, Whole Pouch
From here on, the pouch grows like a little tube: every round is the same two-line instruction. This is the part of crochet that turns into meditation — put on a show and let the walls rise.
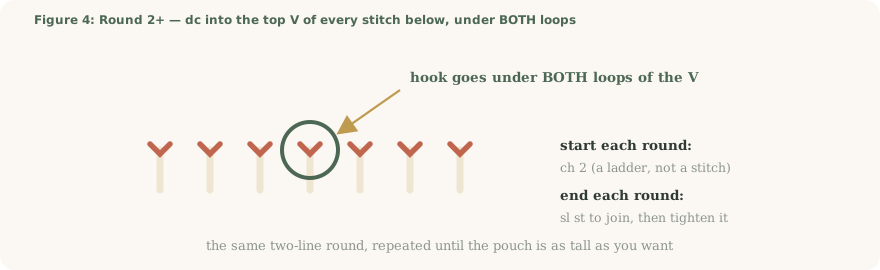
- Chain 2 for height — again, these chains are a ladder, not stitches.
- Double crochet into the top V of every stitch from the previous round, hook entering under both loops, all the way around.
- Slip stitch into the first stitch of the round, and tighten it — same habit as Round 1.
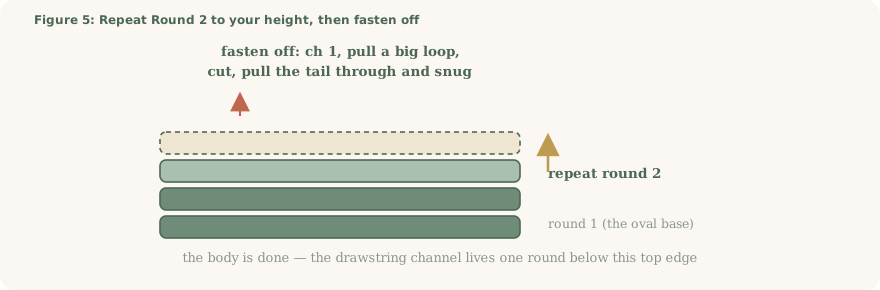
- Repeat these rounds until the pouch is as tall as you want. The sample stops when the piece reads as a neat square; a pencil pouch would simply keep going.
Fastening Off Without Fear
When the height feels right, finish the last slip stitch, then chain 1, pull up a large loop, cut the yarn leaving a short tail, and pull the tail all the way through to lock it. That is fastening off — the stitch equivalent of parking the car. The body of your pouch is complete.
Making and Threading the Cinch Cord
The drawstring is a simple crocheted cord in a contrast color, woven through the top of the pouch so pulling it gathers the mouth shut. It is also removable and swappable — a tiny built-in wardrobe for your pouch.
- With the contrast yarn, make a slip knot and chain a long cord — long enough to travel all the way around the pouch with generous tails left for tying (the sample cord is roughly three to four hand-spans).
- Fasten off and cut. Thread the tail through your tapestry needle.
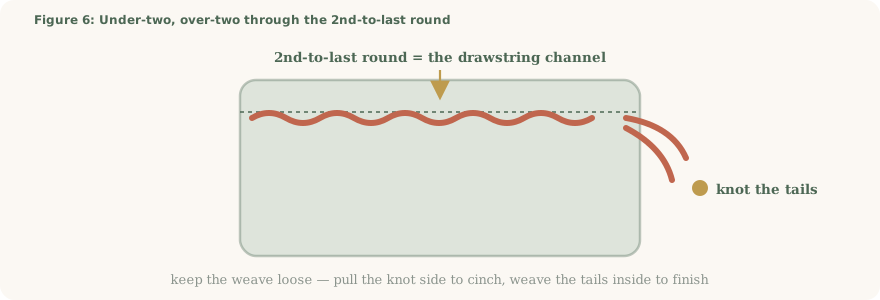
- Starting at the side seam area, weave the cord through the second-to-last round of the pouch: under two stitches, over two stitches, all the way around, until both ends exit at the same point.
- Tie the ends in a firm basic knot (or a bow, if you like living dangerously near loose cords).
- Weave in every remaining tail — the body’s fasten-off tail and the cord’s knot tails — hiding them inside the fabric with the needle.
Troubleshooting and Making It Yours
Five Quick Fixes
| Symptom | Likely Cause | Fix |
|---|---|---|
| Pouch widens unevenly | Loose slip stitches counted as stitches | Tighten every join; count dc per round |
| Base twists in Round 1 | Missed the opposite-side holes or a corner fan | Work into the matching holes along the chain’s back, and fan 3 dc at both ends |
| Edges ripple | Tension too tight | Relax the yarn wrap, or go up half a hook size |
| Cinch sticks | Cord woven too tightly | Re-thread loosely, under-two-over-two |
| Tails poking out | Ends woven too short | Weave each tail back through 3–4 stitches before trimming |
Swipe the table sideways to see every column.
Sizing Cheat Sheet
| To Change… | Adjust… | Example |
|---|---|---|
| Width | Foundation chain length | Earbud pouch ≈ short chain; sunglasses ≈ long chain |
| Height | Number of repeat rounds | Square sample ≈ as many rounds as the base is wide |
| Cinch look | Cord color and knot style | Contrast cord with a bow, tone-on-tone with a plain knot |
Swipe the table sideways to see every column.
Care and Gifting
- Milk cotton likes a cool hand wash and a flat dry; reshape while damp.
- Steam or warm-water blocking relaxes any first-project wobbles beautifully.
- Fill with candies or a gift card and it becomes the wrapping too — the pouch is the present.
Frequently Asked Questions About the Crochet Drawstring Pouch
I have never crocheted anything. Can I really make this?
How much yarn does a drawstring pouch pattern take?
How long does the pouch take to make?
Why does my pouch lean or grow extra stitches?
Why is my Round 1 base twisted or pointed instead of a smooth oval?
Can I make it bigger, and does the crochet cinch bag pattern change?
What hook and yarn substitutions work for this crochet drawstring pouch?
Can I sell finished pouches?
One Evening, One Ball of Yarn, One Real Thing
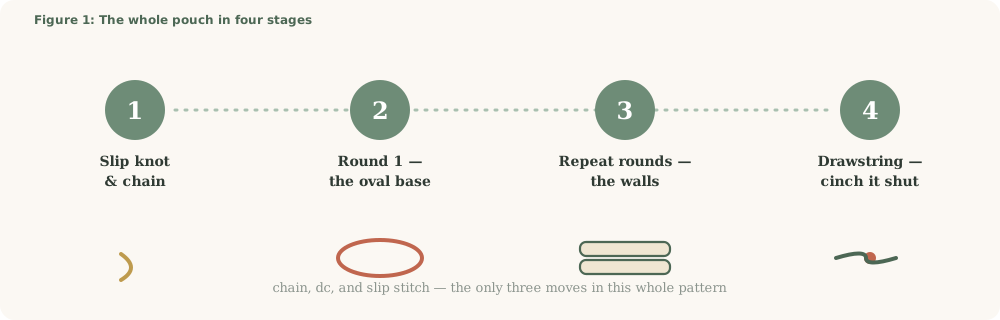
Look at what just happened: a slip knot became a chain, the chain became an oval, the oval grew walls, and a simple cord turned a square of stitches into a bag that opens and closes at your pull. Every bigger project you will ever make — bags, blankets, garments — is just this same alphabet spoken in longer sentences.
Your first-pouch checklist:
- Slip knot, then chain to your pouch width and chain 2 for height
- First dc in the 3rd chain from the hook, mark it, dc across
- 3 dc in the last chain, dc down the opposite side, 3 dc in the starting chain, slip stitch to join — tightened
- Round 2 onward: ch 2, dc in every V, slip stitch, tighten — repeat to height
- Fasten off with ch 1, big loop, cut and pull tight
- Chain a long cord, weave under-two-over-two through the 2nd-last round, knot, weave tails
- Cinch it, fill it, and start planning the next color
Ready for your first pull of the drawstring?
Pick the green, pick the terracotta, pick the color that made you stop scrolling. One hook, one ball, one quiet hour — and tonight your desk holds a little pouch that exists because you made it.